A variant is a derivative of an existing product. That means, if several items only differ in few characteristics (important for the item), then these are item variations. In short: “item variants are in principle equivalent yet still different”. In order to get a better understanding of the term, a short trip into the automotive world follows. The passenger car - model “XY” of a car manufacturer is offered in several variants with special model data (color, equipment, and motorization). But all “XY” - models have common basic data (4 wheels, 1 steering wheel, 1 tank, 1 model name). In order to provide item variants, one must also divide the characteristics of the item into model data and basic data. All variants of an item cannot thus differ only in the model data and under no circumstances in the basic data. If you want to produce variants from an item already provided, you must still only assign it its key and model data. In addition, you proceed as follows.
Practice assigning type data
Note; In order to create the type data of an item, you have to be in the detail view.
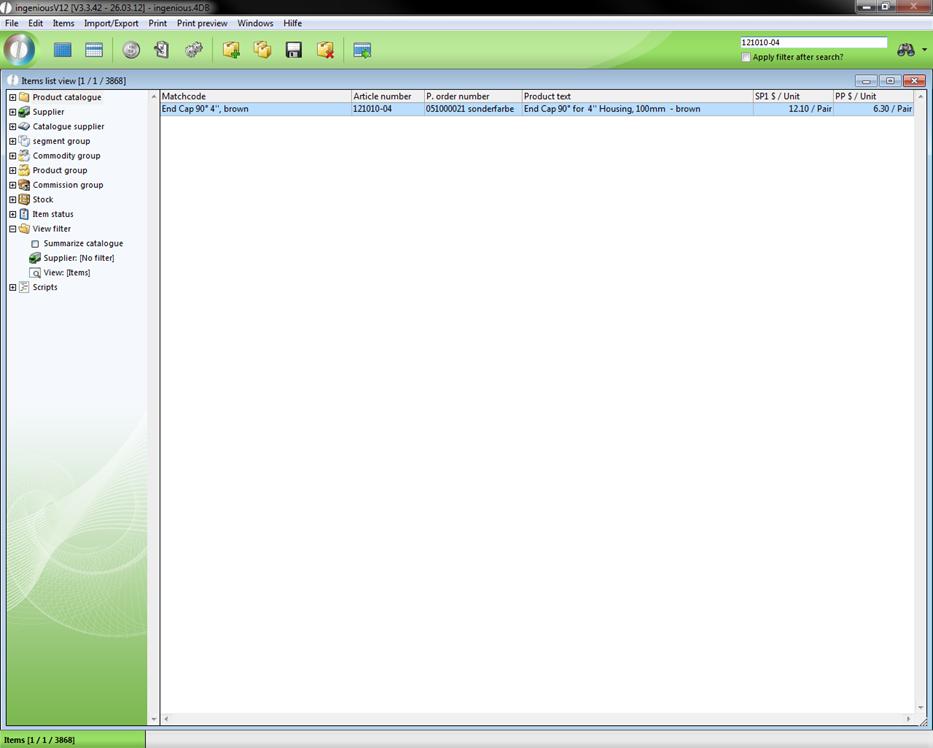
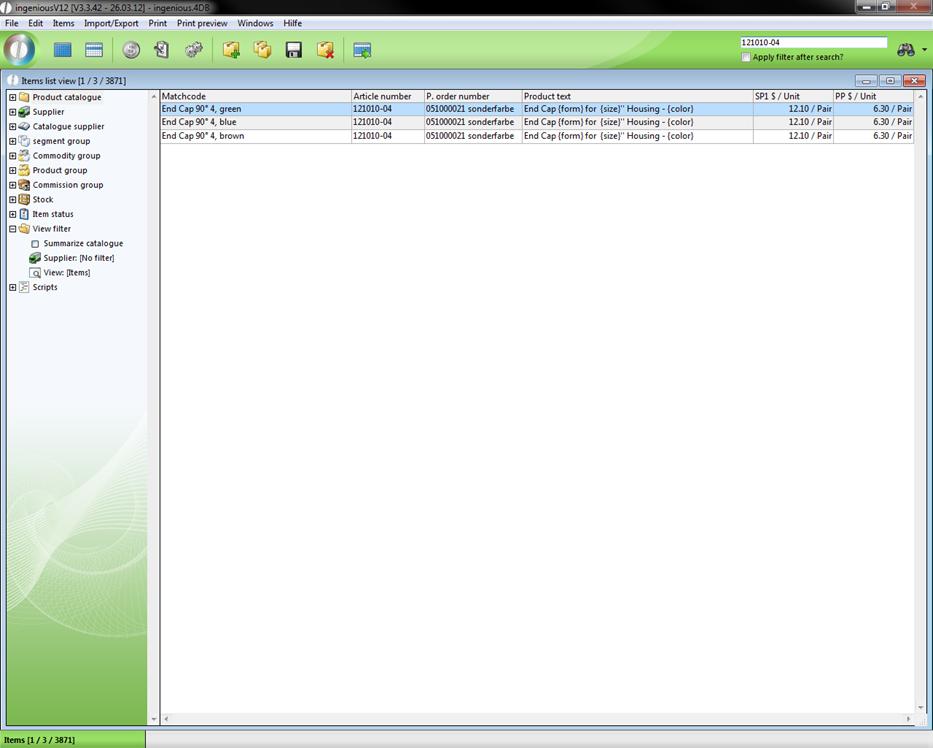
1. Mark the item, by which late variants are to be produced. In this example it is the file with the item number “121010-04”.
2. Open the detail view of the item by double-clicking.
3. The symbol for the production of the main and type data is now switched from the inactive ![]() to the active
to the active ![]() status. Click on it.
status. Click on it.
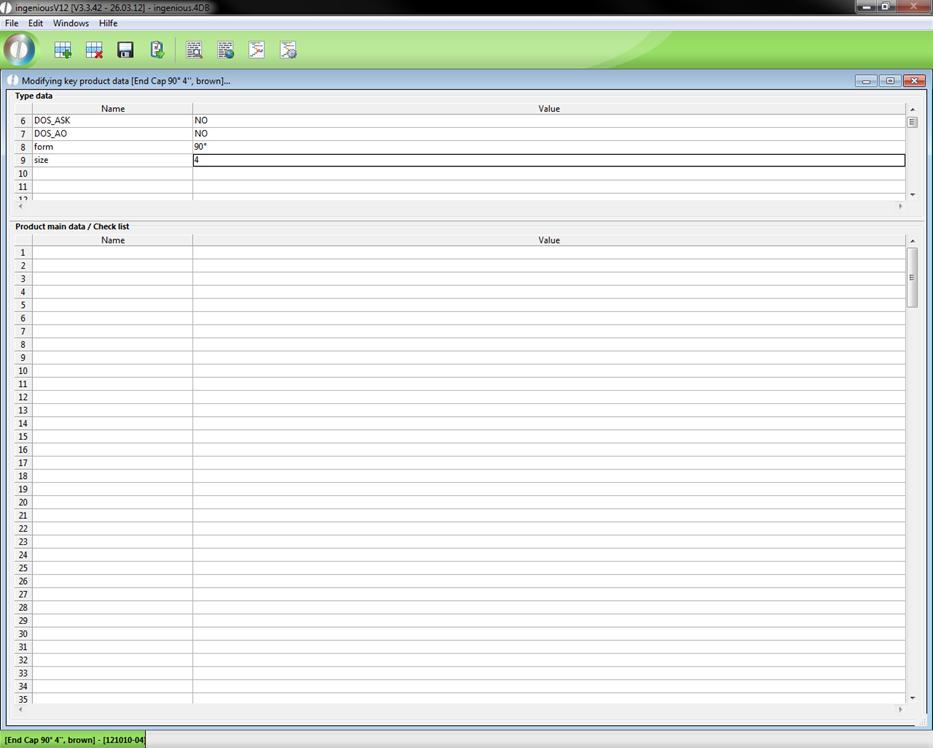
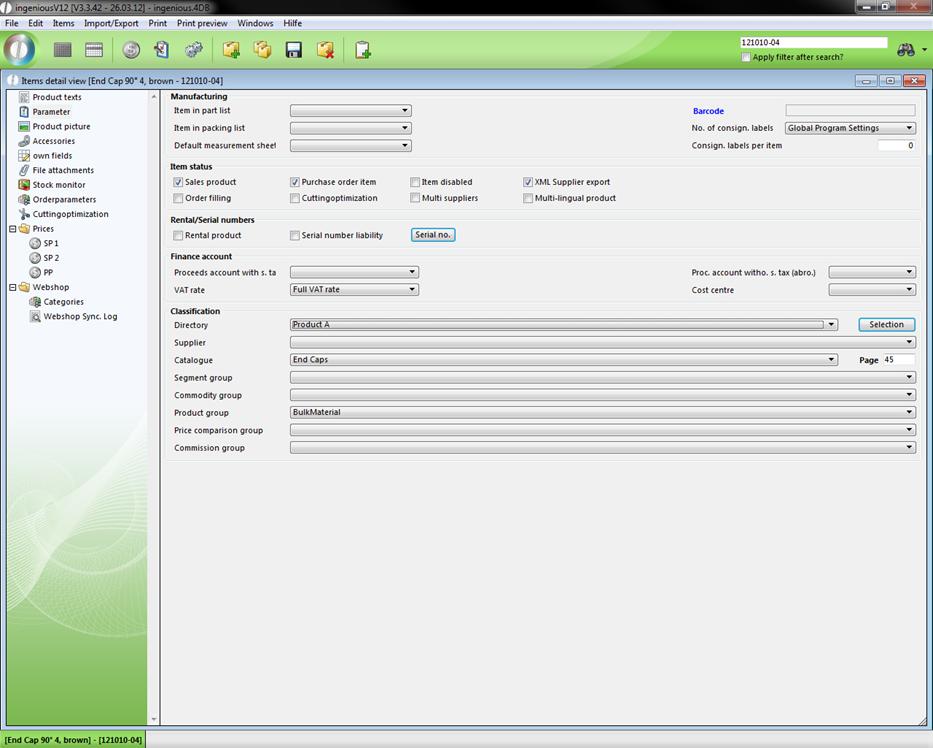
The appropriate window appears on the screen. In this example, the variants are to differ only by the color. Material and nominal thickness are to be used as basic data.
4. In the column, “Name” of the area, “Typdata”, enter other the values “Form” and “Size” among each other. Do this right next to “90°” and “4”.
Your window will look like the following.
Settings of the basic data
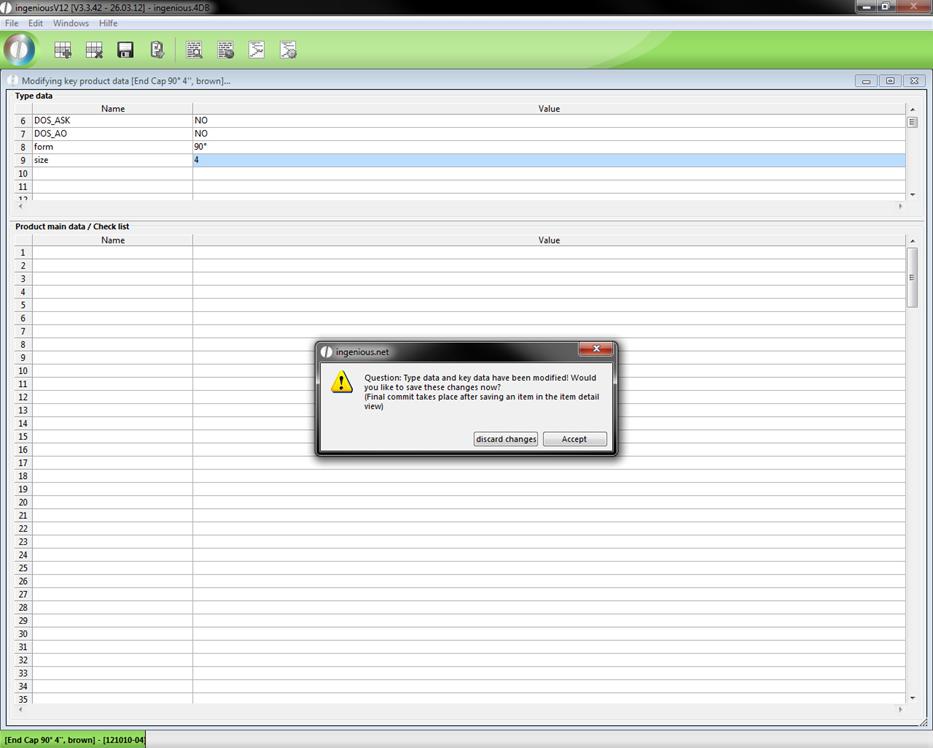
5. Close the window with ![]() and confirm the request with “Accept”.
and confirm the request with “Accept”.
You will find yourself again in the detail view of the file.
The values in the column, “Name” can be used as a placeholder in the item field, “Simple Text (ASCII) and “Formatted text (RTF). This means that in place of the placeholder, the applicable value will appear in the text. The names of the placeholders will always be contained in curly brackets ({…}).
In the current setting of the basic data, you have two possible placeholders, “Size” and “Size”.
1. Change the “SimpleText (ASCII)” as follows.
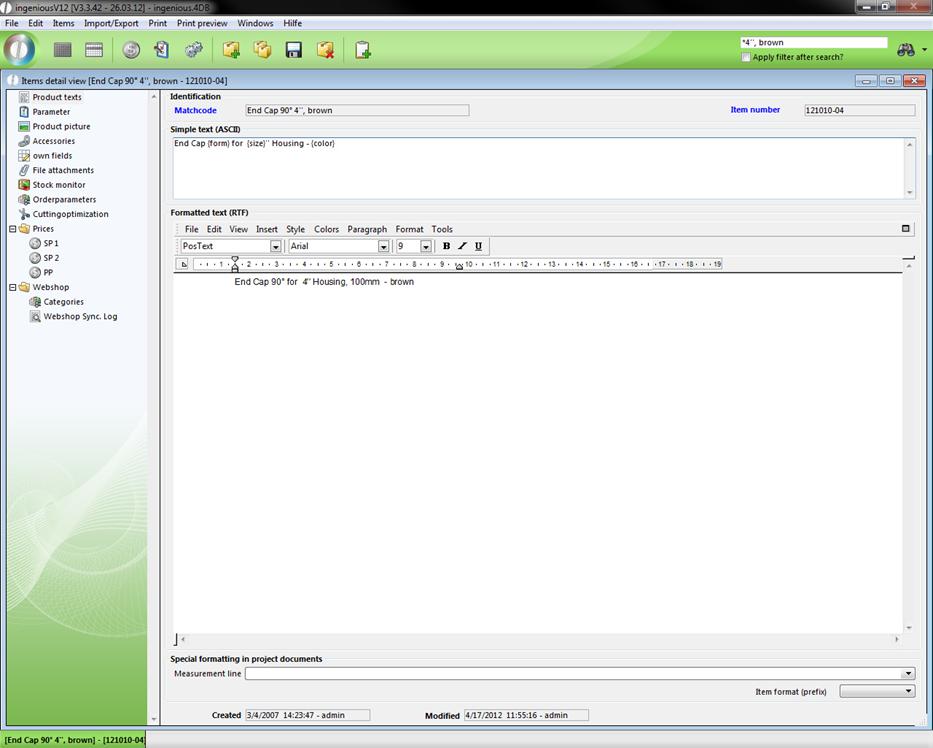
When printing the text, Ingenious.V12 replaces the placeholder with the corresponding values.
Don’t forget to secure the changes in the list view.
Practice generating variants
1. Highlight the file from which you want to generate variants. In this example, please select the file already known to you with the item number, “121010-04”.

2. In the main menu, select the entry “Items/Create variants”.

3. A window with the label, “Create variants” appears.
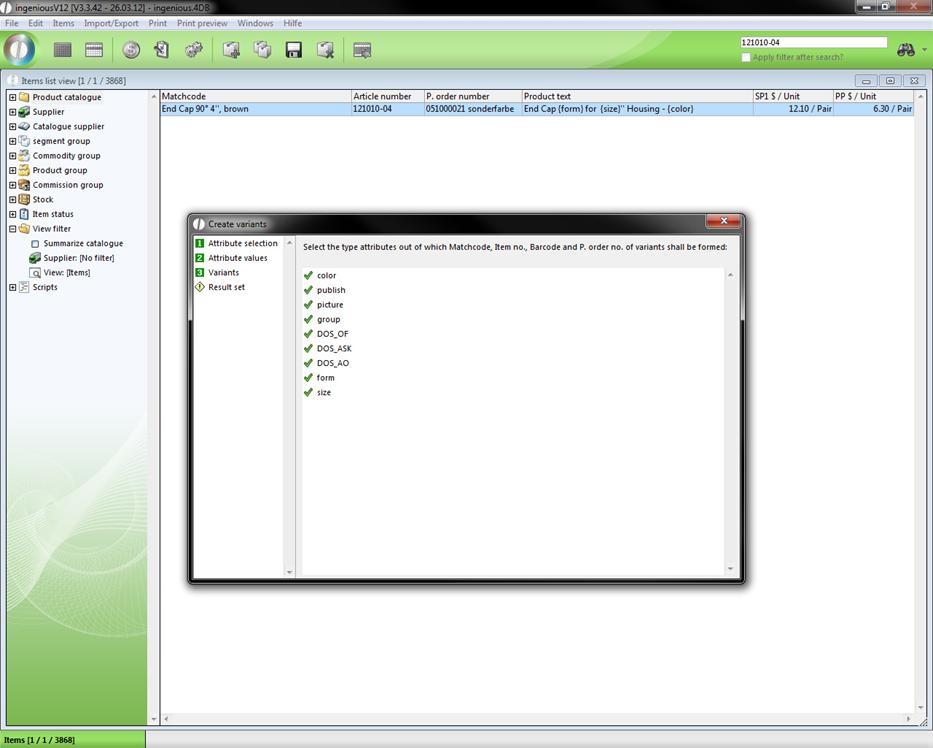
This window divides the variant creation in the left part into four steps. “1 Attribute selection”, “2 Attribute values”, “3 Variants” and “Result set”. They are found momentarily in the first step. On the right side is the selection of the type attributes. This selection depends on which type of data you gave the item, from which you produce the variants.
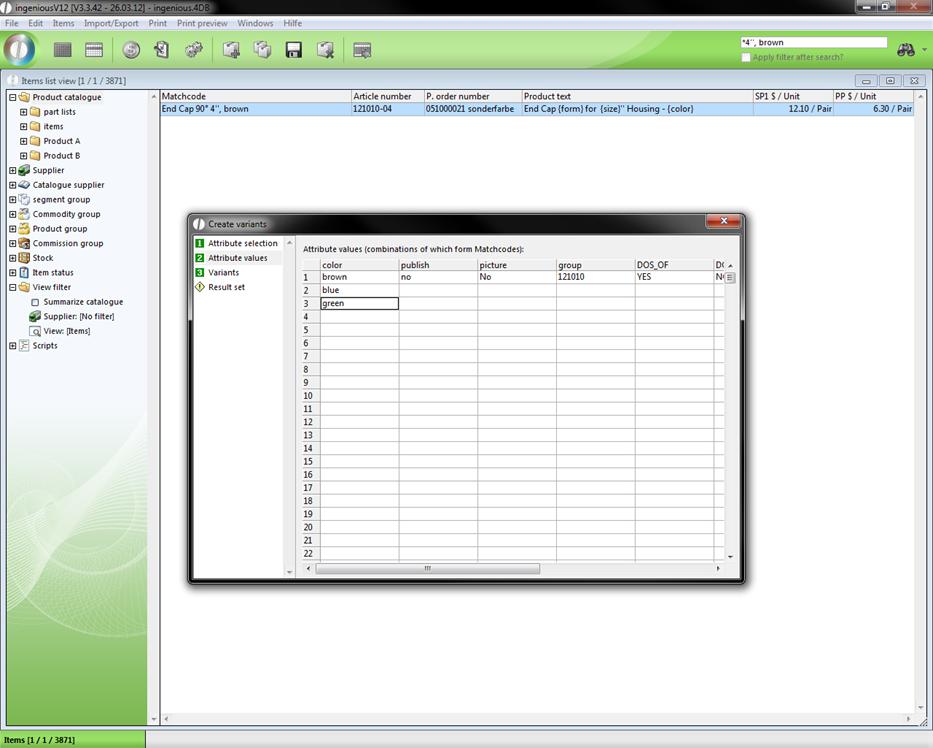
4. Leave the attributes marked and click on ![]() . In the open window, the model data of the basic item is indicated automatically under point 1 “Attribute selection”. By double-clicking on the attribute, this can be renamed. Replace the attribute “brown” with “blue”. In addition, more colors of the attribute can be noted, i.e. green and yellow.
. In the open window, the model data of the basic item is indicated automatically under point 1 “Attribute selection”. By double-clicking on the attribute, this can be renamed. Replace the attribute “brown” with “blue”. In addition, more colors of the attribute can be noted, i.e. green and yellow.
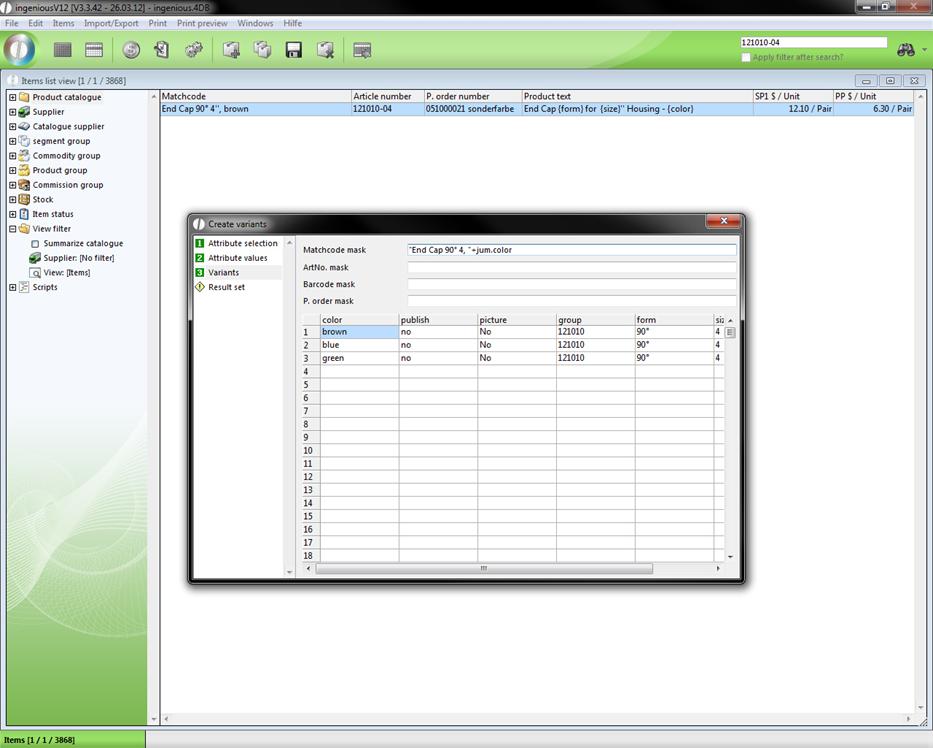
5. Under 3 “Variants”, it is possible to generate masks or templates for the matchcode, for the item number, the bar code as well as the purchase order number (over the field editor by means of the jumbo language it is now possible to create conditions for the allocation of number). In the example, only the matchcode is changed over the entry, “End Cap 90° 4, “+jum.color. The matchcode now contains the word “End Cap 90° 4,” with the pertinent attribute color.
6. Now switch to the column “Result set”. The preview of the item variants is adapted to the field size in the database. If a matchcode has 50 characters for example, one can already see in the preview, which indications are cut off, and one thus has the possibility of already making appropriate modifications before the construction of the item. Now click on the icon ![]() in order to generate the item variants.
in order to generate the item variants.
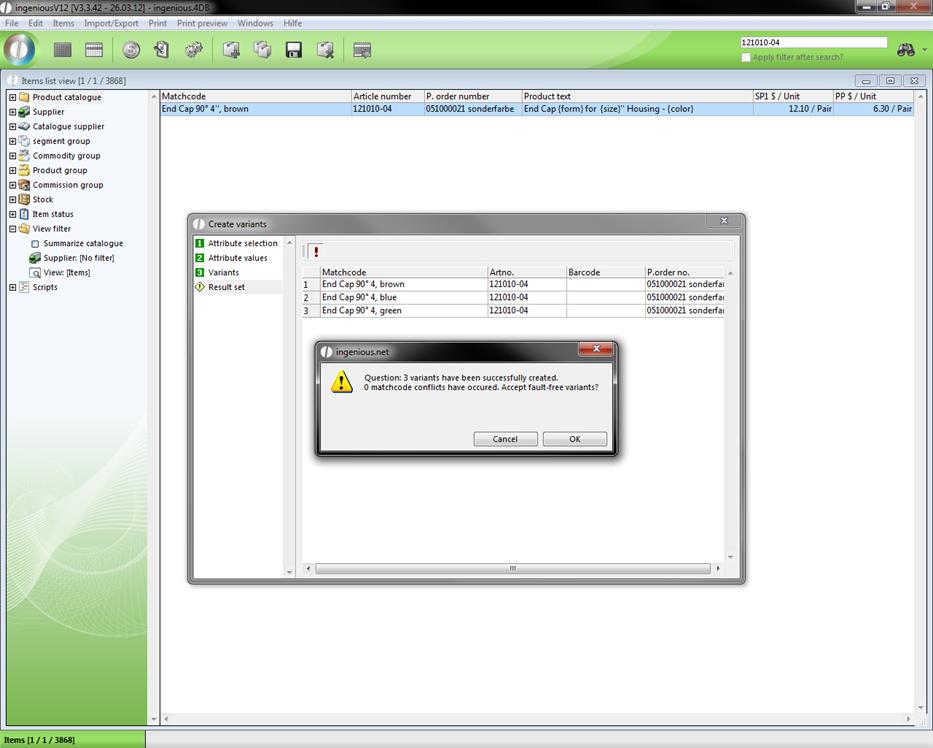
7. Confirm the window that appears with “OK”. You will automatically go back to the item view, in which your item variants are now shown.
8. In order to provide the placeholder as ASCII text, click in the menu on “Resolving text macros”.


9. Switch in the detail view from one of the two newly created variants and control whether the settings of the original file should be transferred. You can now, if necessary, change the item number, order number, etc. of the record.
Practice editing item variants
1. In the detail view, change the record from which the variants were generated. Change then to the record, “End Cap 90° 4“, brown”
2. In the column, “Parameter”, select and change the listing in the area, “Directory” to “Product A”.
3. Save the change with the ![]() button and go back to the list view.
button and go back to the list view.
4. Leave the file highlighted and select “Edit item/Variants”.
A new window opens to edit the variants.
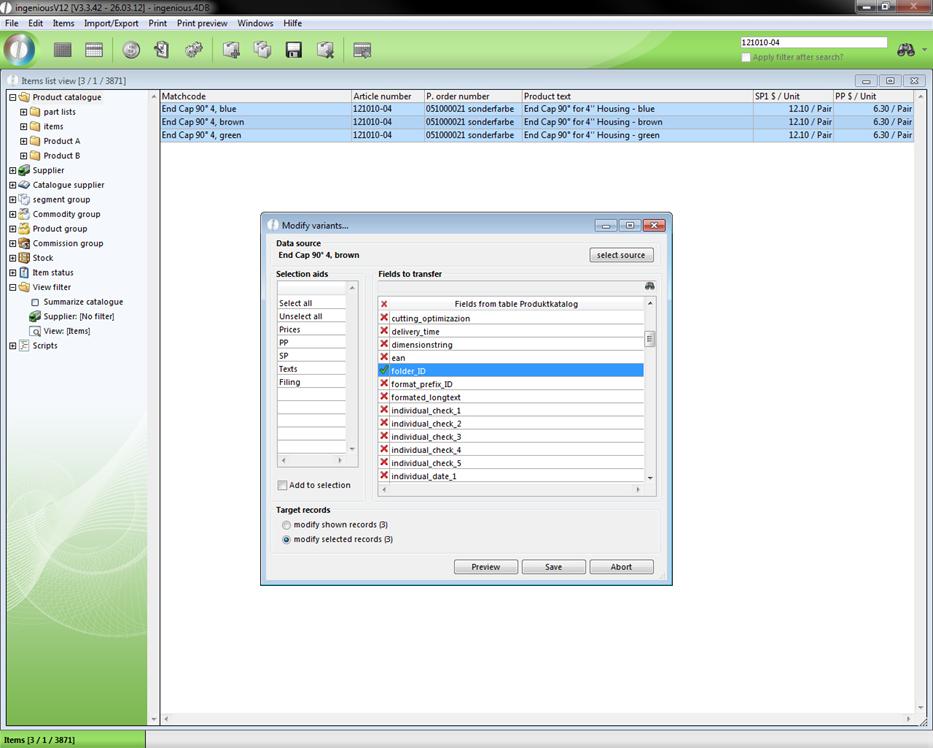
5. From the area, “Fields to be transferred”, select the entry, “Folder ID”. The entry has to be tagged with the green checkmark.
6. Click on the “Accept” button in order to assign the file “Product A” in the product catalogue to all variants derived from this record, as a folder.
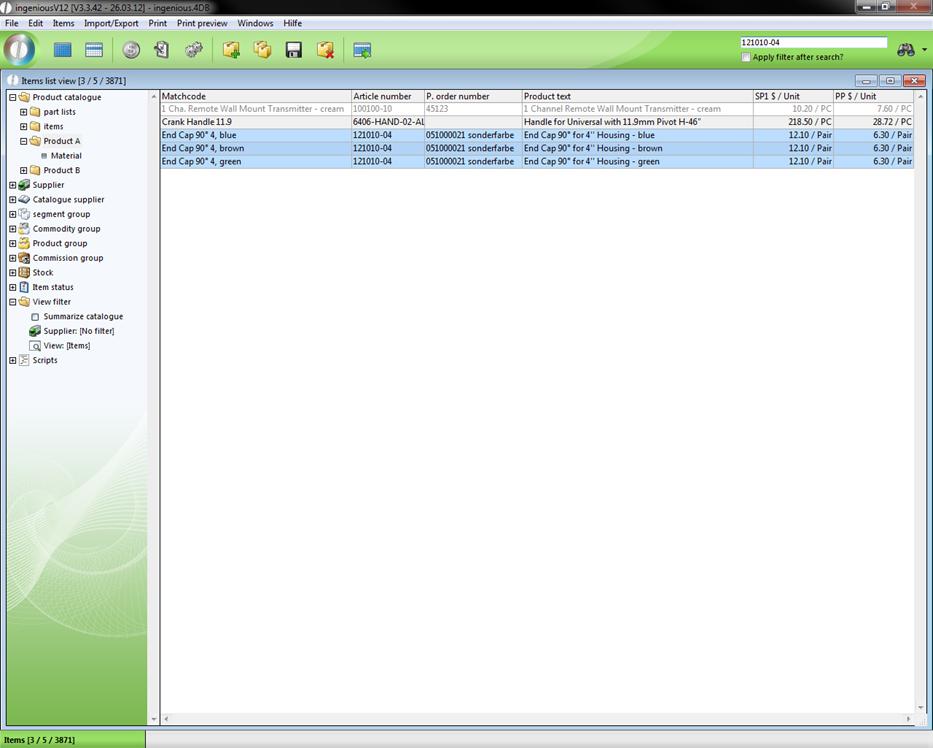
You have just shifted the items from the product catalog into the file “Product A”. In this way (“Items / Edit Variants”) you can transfer the characteristics at any time from the “Original record” to the derived data records (variants).